1. Introduction to HPOS
HPOS (Harmonized Point of Sale) is a powerful business management system that brings all the moving parts of your operations into one place. Whether you are in retail, wholesale, or manufacturing, HPOS helps you save time by automating tasks and provides real-time insights to help you run your sales, manage purchases, track inventory, handle customer relationships and generate detailed reports for your business.
2. Getting Started
2.1 Logging In
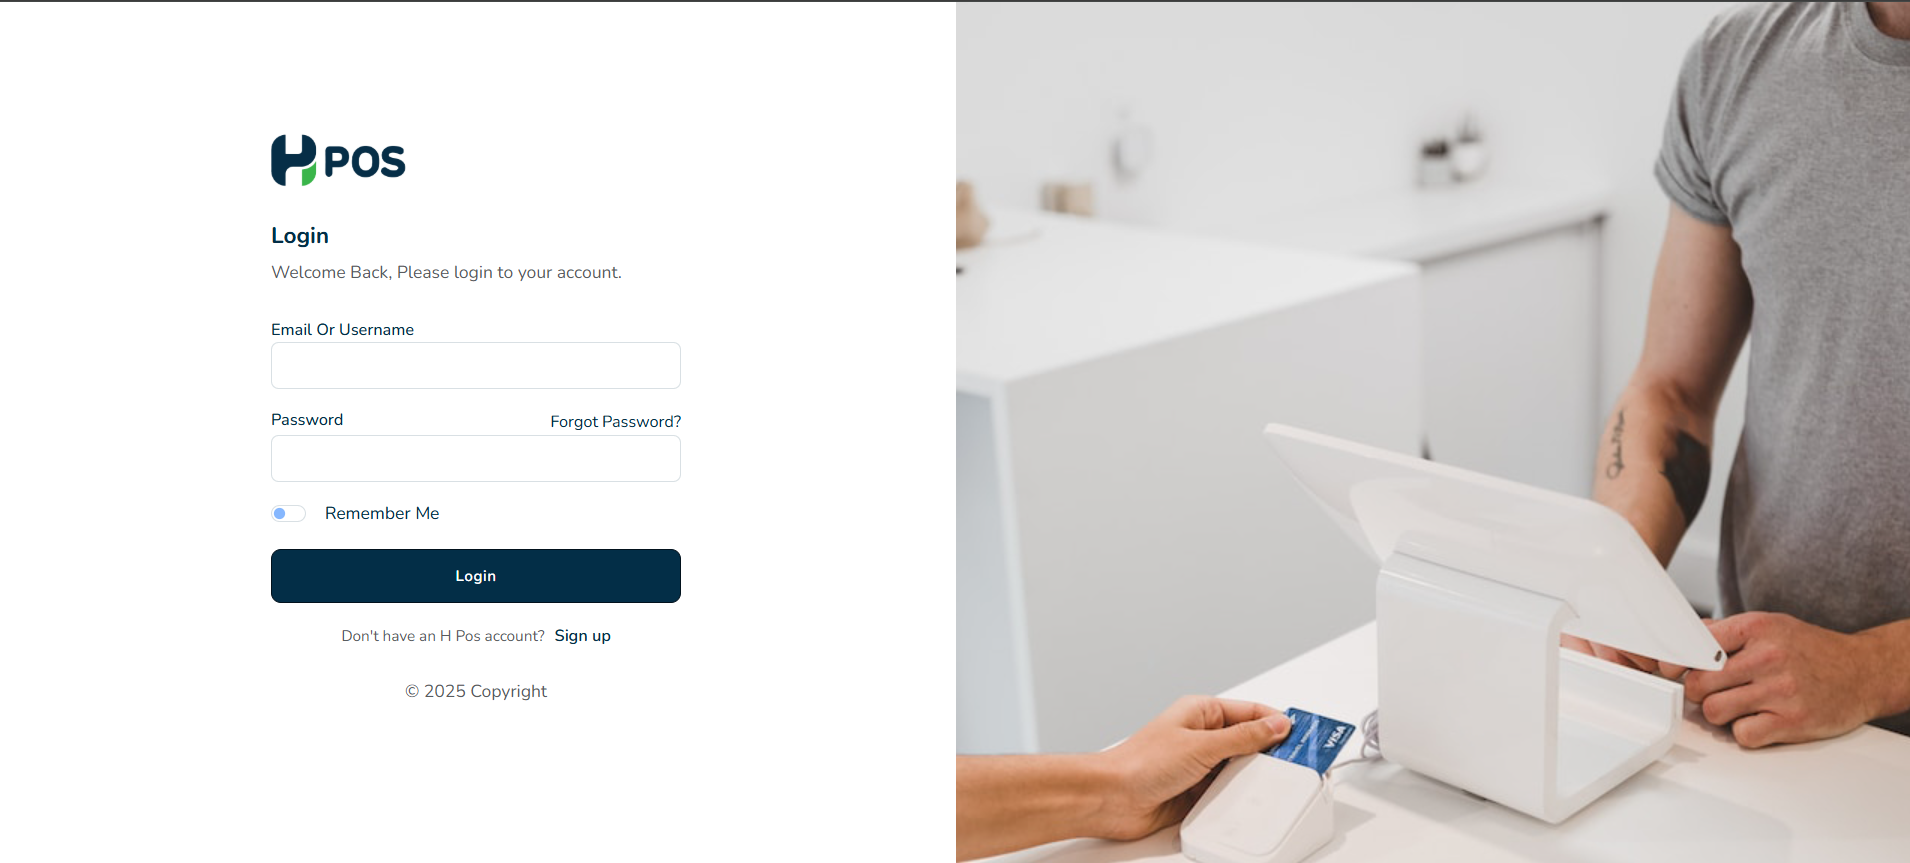
Visit HPOS Dashboard.
Enter your email and password.
Click Login to access the system.
2.2 Navigating the Dashboard
Upon login, you’ll see the Fiscal Harmony Dashboard, which provides an overview of:

Sales & Purchases (daily, monthly, yearly)
Order Tracking (sale & purchase orders)
Top-Selling Products
User, Customer, and Supplier Statistics
3. Core Features & How to Use Them
3.1 Sales Management
Creating a Sale Order

Go to Sales → New Sale Order.
Select the customer from the list or add a new one.
Choose the products to sell.
Enter quantity, price, and discount (if applicable).
Click Pay to finalize the sale.
Tracking Sales
View all sales under Sales Orders.
Statuses include:
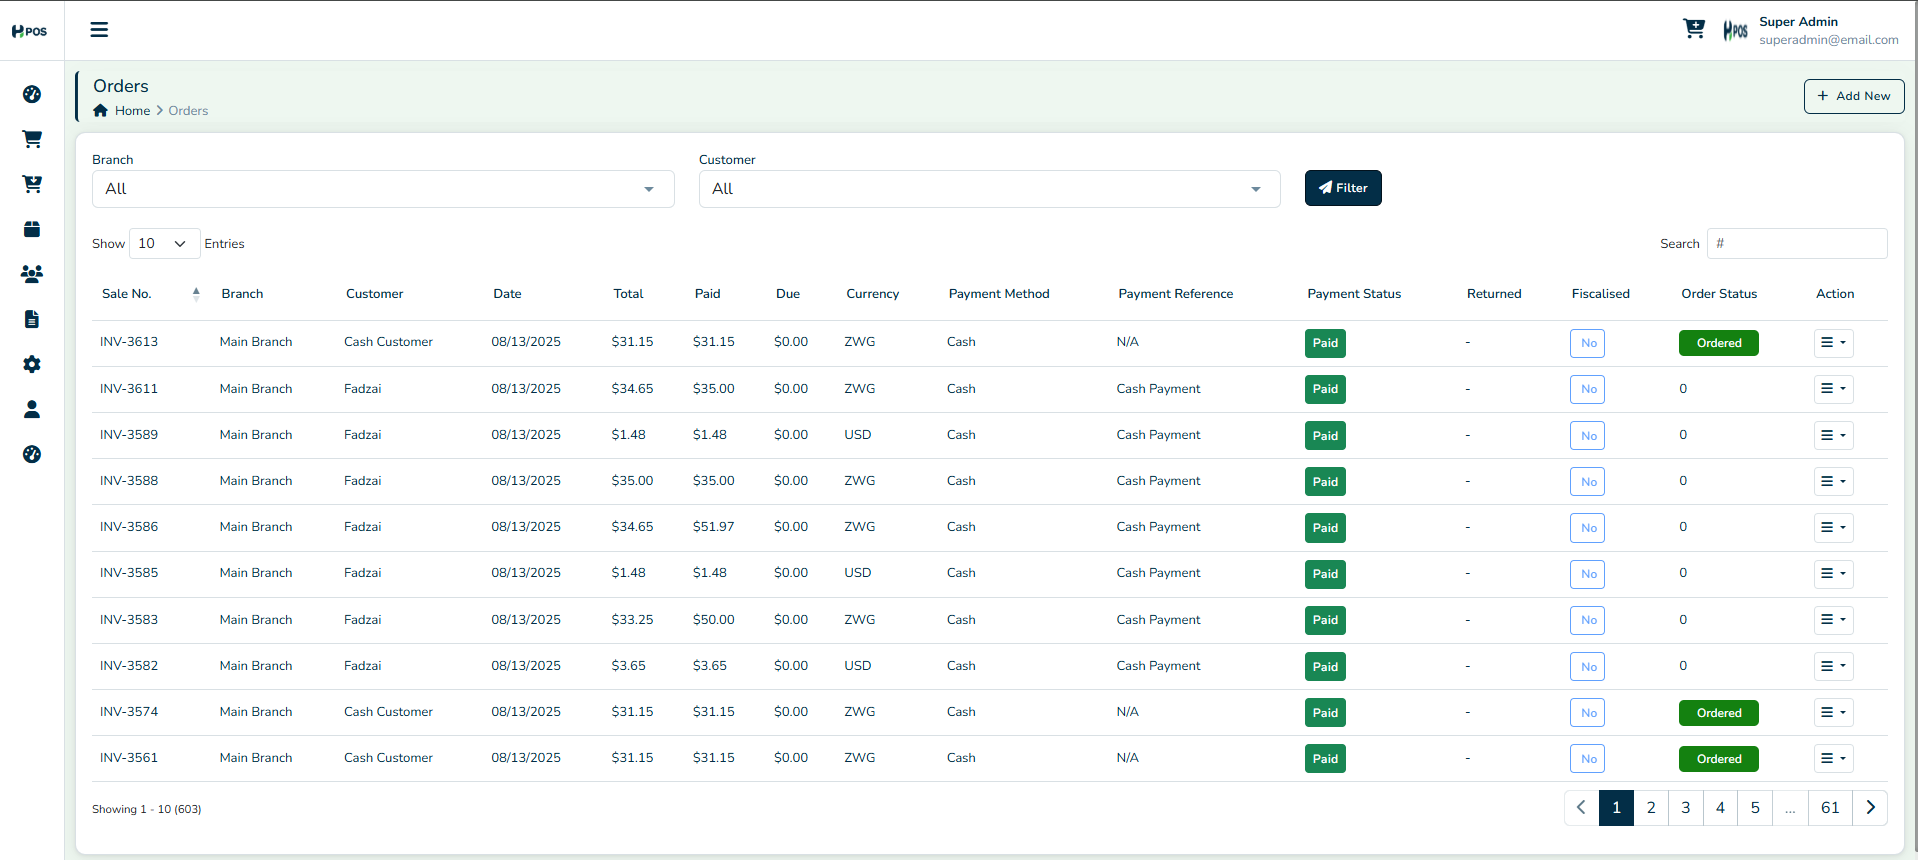
Received – Order completed and payment received.
Partial – Some items delivered, others pending.
Pending – Order placed but not yet processed.
Ordered – Items requested but awaiting fulfillment.
Cancelled – Order voided by the user.
Processing Sale Returns

Navigate to Sales Returns.
Select the sale order to return.
Choose the items and quantity to return.
Confirm the return and update inventory.
3.2 Purchase Management
Creating a Purchase Order
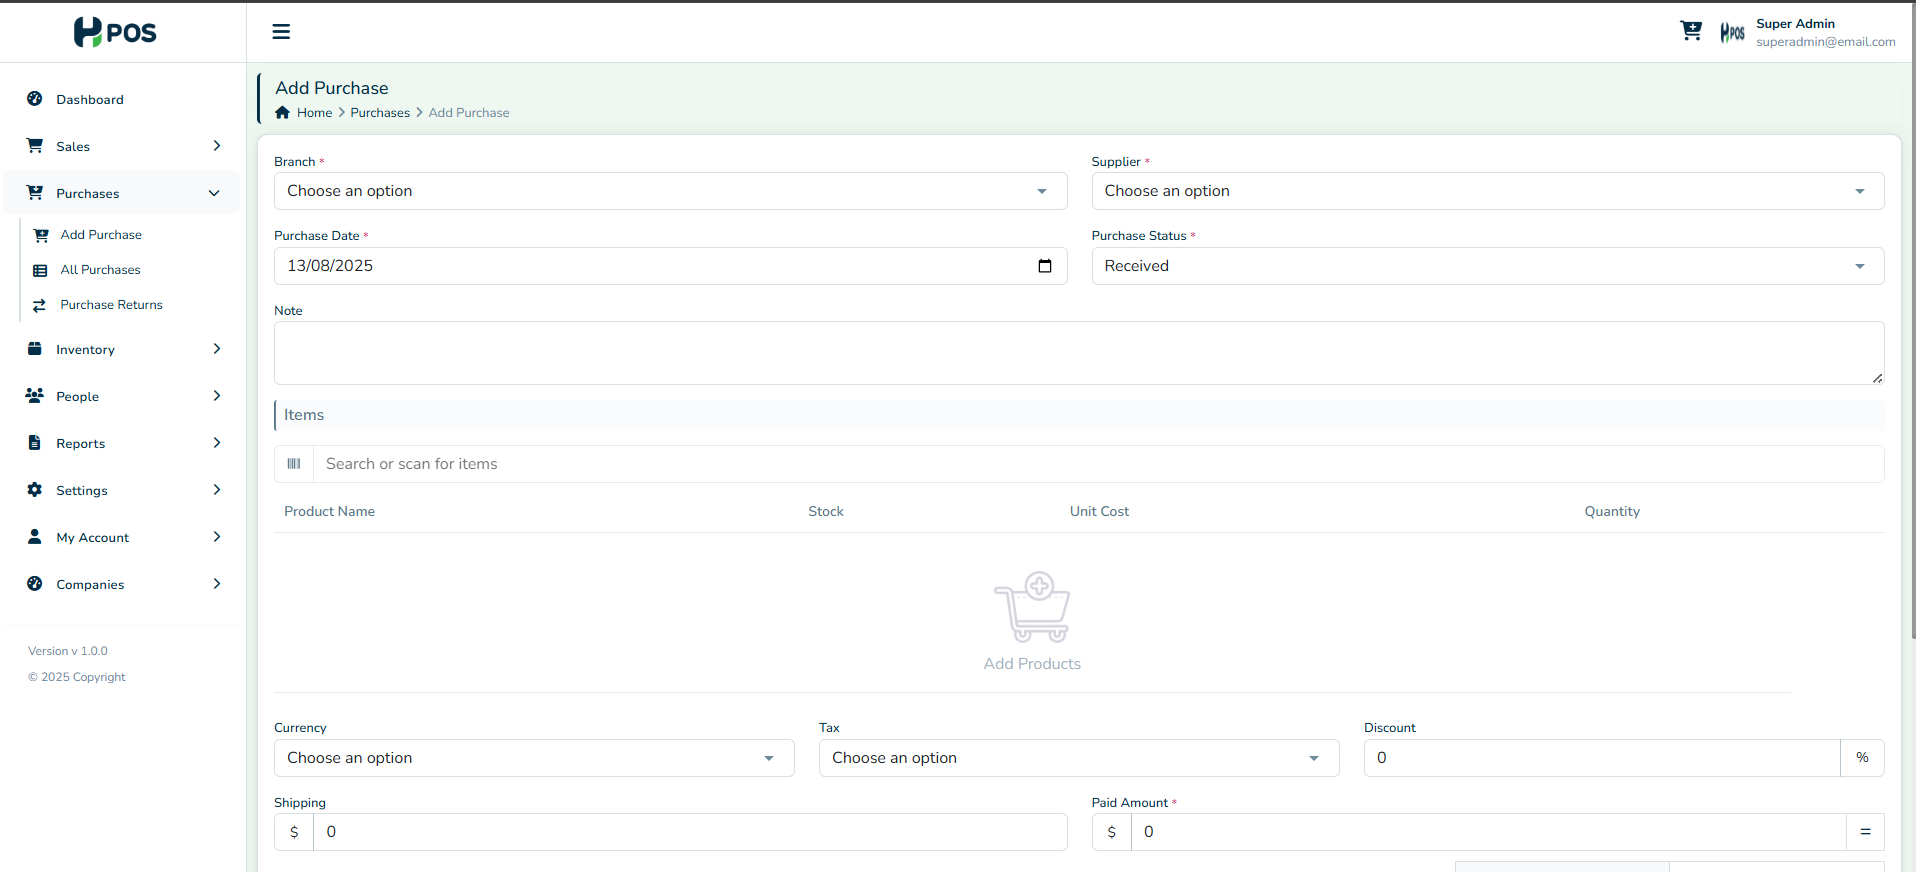
Navigate to Purchases → New Purchase Order.
Select the supplier from the list or add a new one.
Choose the items to purchase.
Enter quantity, cost, and expected delivery date.
Click Save to process the order.
Tracking Purchases

View all purchase orders under Purchase Orders.
Monitor order statuses for better inventory planning.
Processing Purchase Returns

Navigate to Purchase Returns.
Select the purchase order to return.
Choose the items and quantity to return.
Confirm the return .
3.3 Inventory Management
Adding New Products

Go to Inventory → Add Product.
Enter product name, code, category, and stock quantity.
Set selling price and purchase cost.
Click Save to update inventory.
Stock Tracking
Monitor stock levels in Inventory Reports.
Adjust stock manually if needed.
View top-selling products and their earnings.
Handling Stock Adjustments
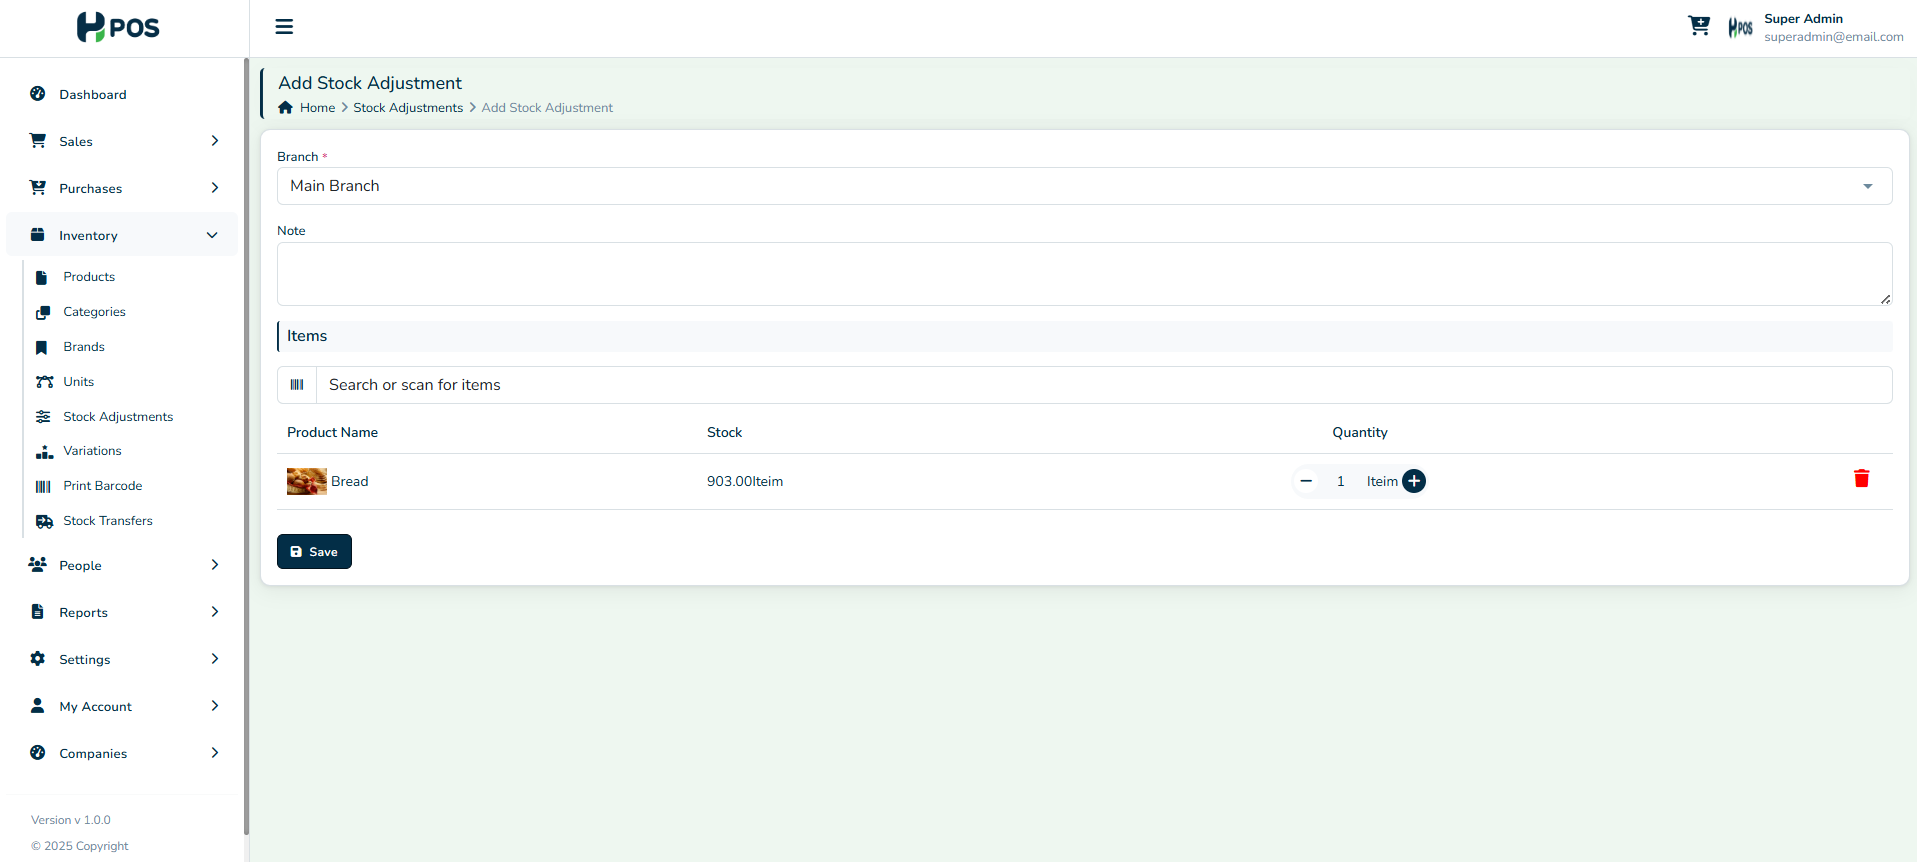
Navigate to Inventory Adjustments.
Select the product to adjust.
Enter the new stock quantity.
Provide a reason for adjustment (e.g., damaged goods, stock correction).
Click Update to finalize changes.
3.4 Customer & Supplier Management
Adding a Customer

Navigate to People → Customers → Add New Customer.
Enter name, contact details, and address.
Click Save.
Managing Customer Accounts
View customer purchase history.
Track outstanding payments.
Adding a Supplier

Go to People → Suppliers → Add New Supplier.
Enter supplier name, contact details, and products supplied.
Click Save.
Managing Supplier Accounts
View supplier transaction history.
Track pending purchase orders.
Manage supplier payments.
3.5 Reports & Analytics
Viewing Business Performance
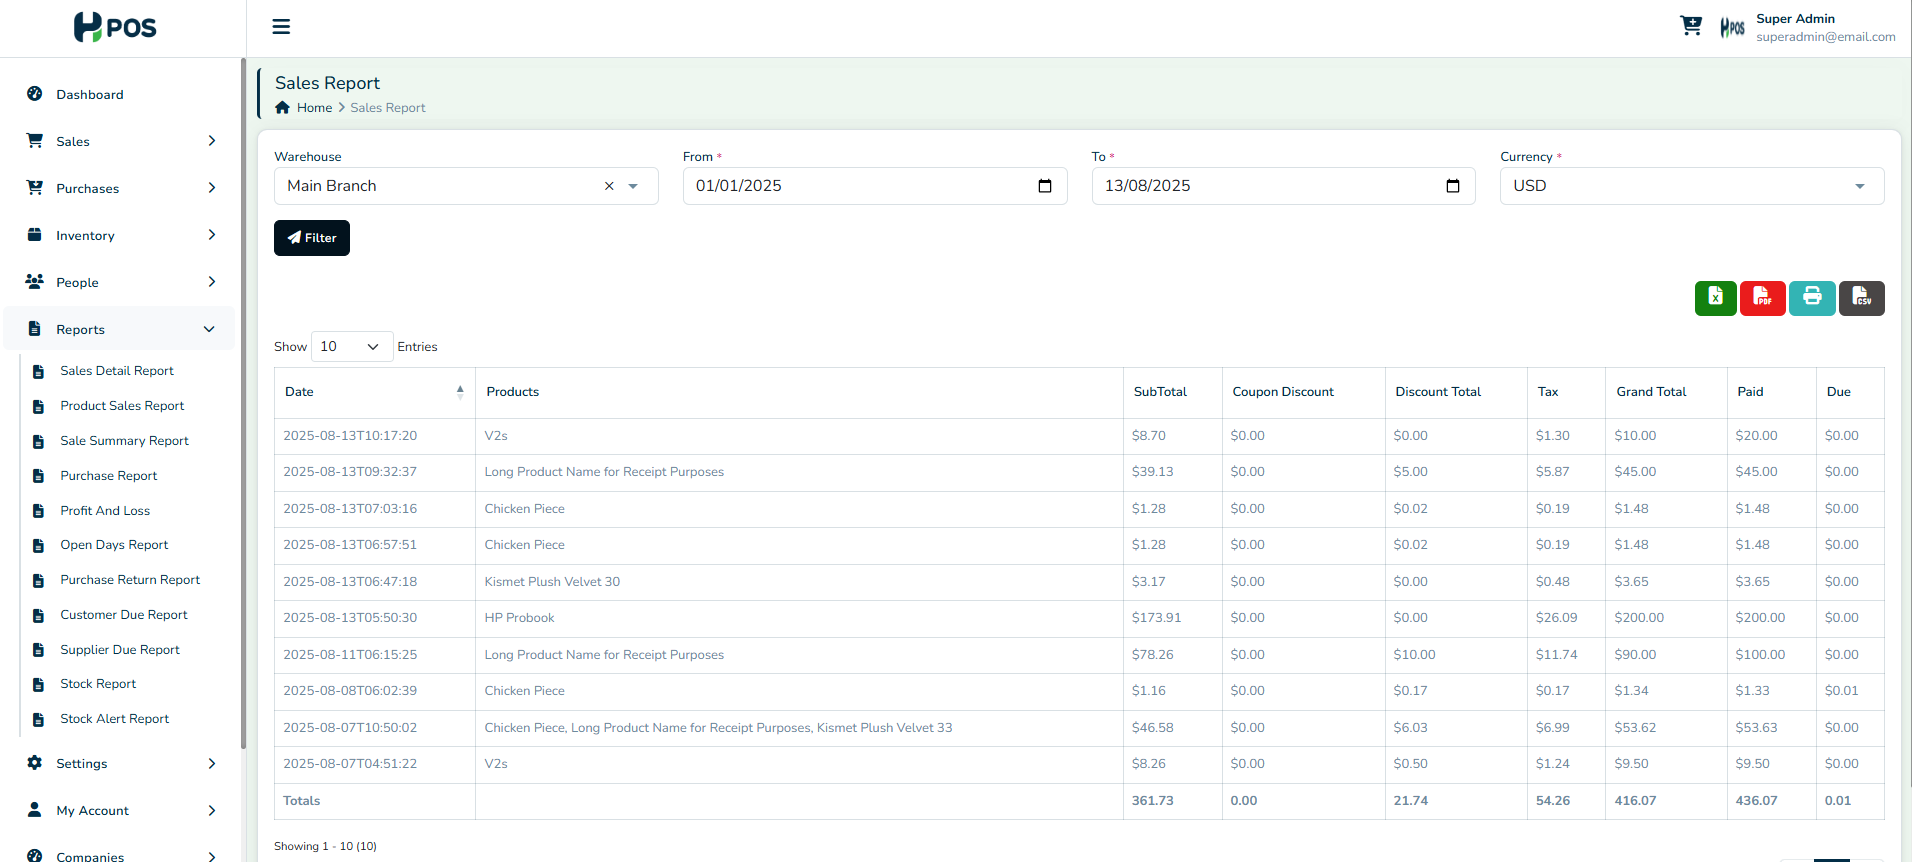
Access Reports to analyze:
Sales trends (daily, monthly, yearly).
Purchase history and supplier performance.
Inventory movement and stock levels.
Expenses and profitability.
Exporting Reports
Click Download to export reports in PDF or Excel format.
Use filters to customize report views.
4. Settings & Customization
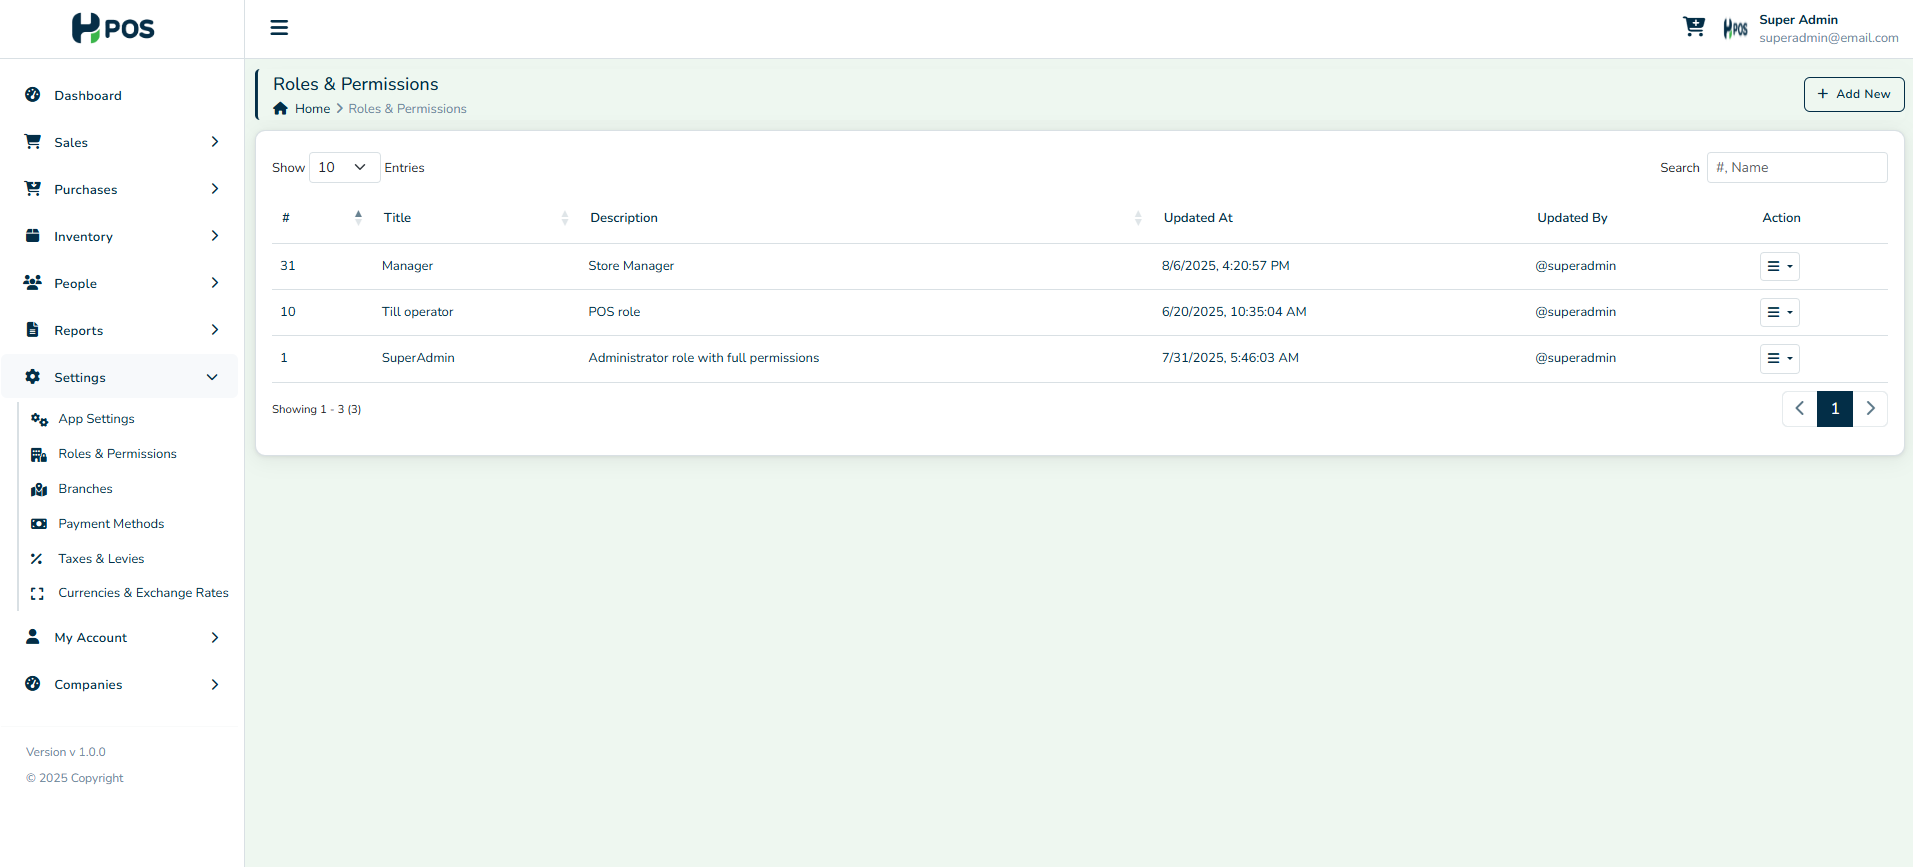
4.1 User Management
Go to Settings → Users to add or remove users.
Assign roles:
Super Admin – Full access to all features.
Salesperson – Can process sales and view reports.
Inventory Manager – Manages stock and purchases.
Was this article helpful?
That’s Great!
Thank you for your feedback
Sorry! We couldn't be helpful
Thank you for your feedback
Feedback sent
We appreciate your effort and will try to fix the article