This guide walks you through the steps to correctly create, save, and fiscalize a Sales Invoice in ERPNext, ensuring compliance by applying necessary taxes and submit your invoice.
1. Starting a New Sales Invoice
Follow these steps to access the Sales Invoice form:
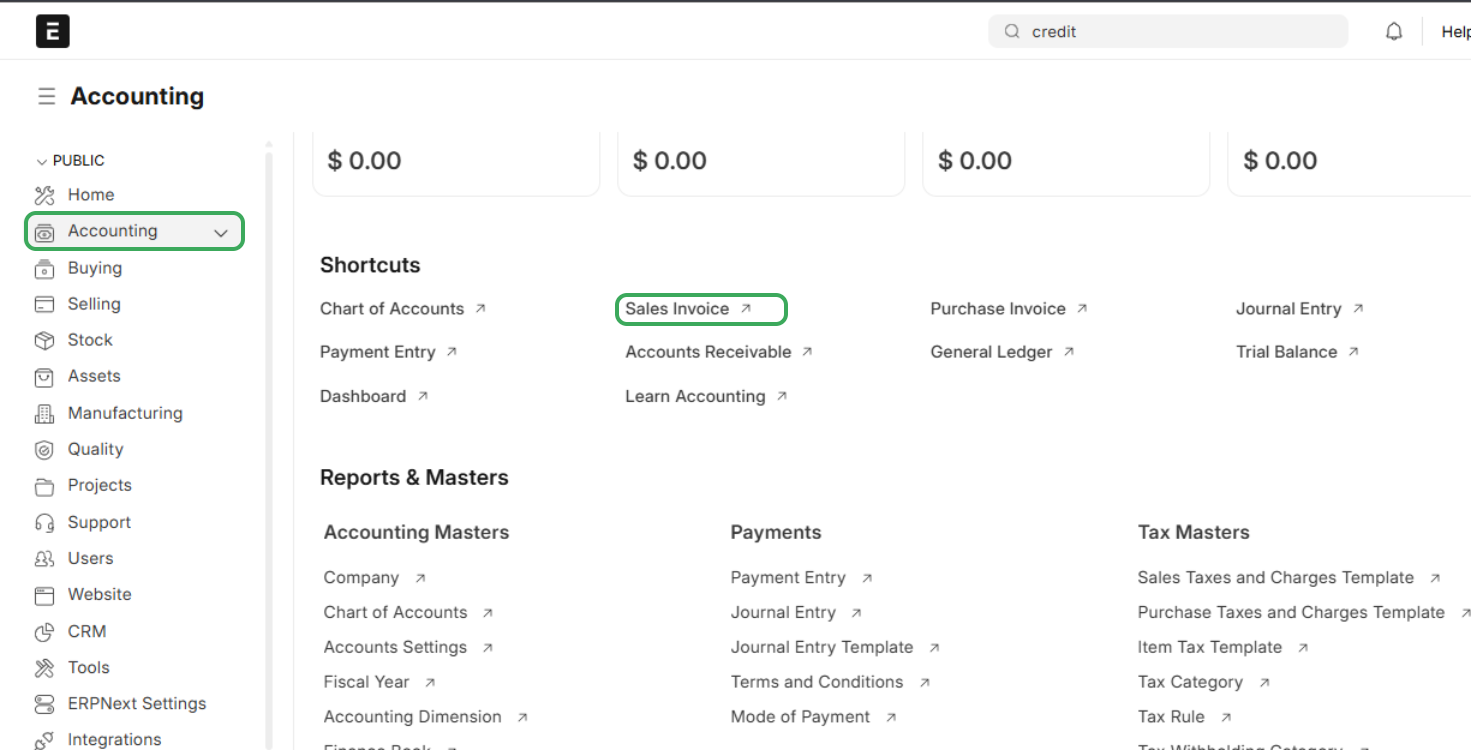
- Navigate to the Accounting module from the sidebar menu
- Under Shortcuts, click on Sales Invoice
- On the Sales Invoice list page, click the + Add Sales Invoice button
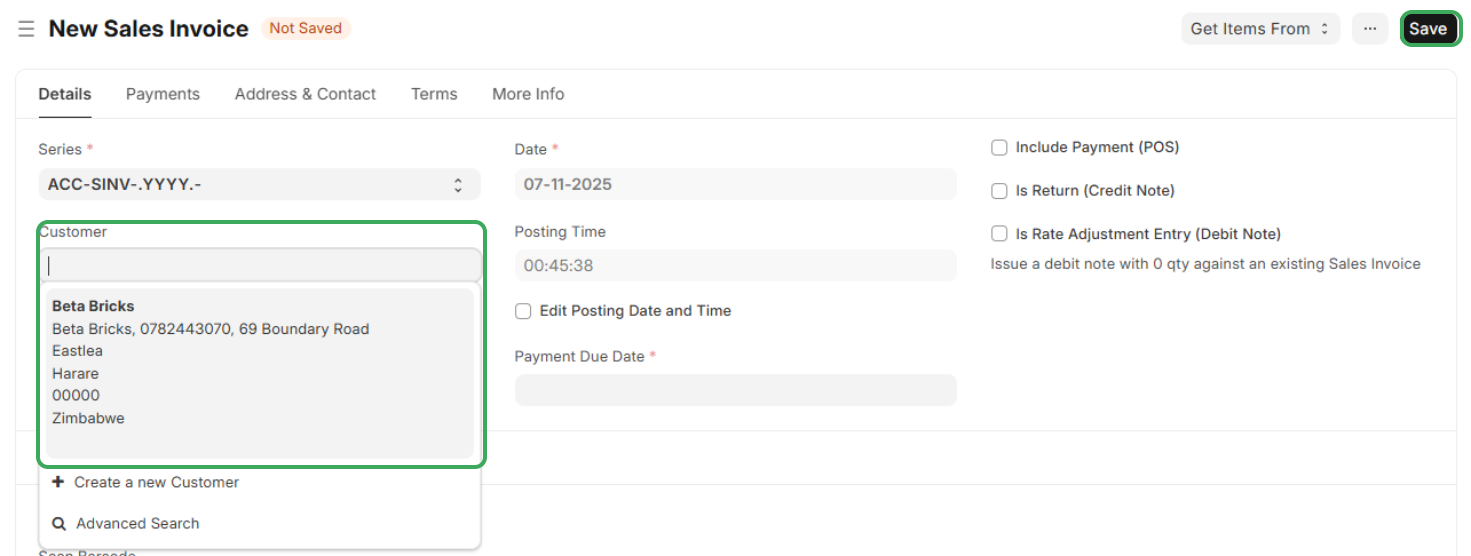
- You will now see a new Sales Invoice page with a Not Saved status

2. Filling in the Invoice Details
Enter the important information for your sale on the new invoice form and use the current date always :
Customer Details :
- In the Customer field, start typing the name of your client. Select the existing customer (NB: The system will pull the customer adderss and contact automatically)
3. Adding Items and Services
Scroll down to the Items section to detail the goods or services provided:
- Add Products/Services: Click on the row to add the products or services you are selling.
- For each item, enter the correct:
- Product/Service Name
- Quantity being sold
- Price per Unit
4. Applying Taxes and Charges Mandatory for Fiscalization
This is a critical step for fiscalizing the invoice:
- Navigate to the Taxes and Charges section if you scroll down
- You must fill in this section to apply the correct taxes for your products or services as required by ZIMRA regulations. This is often done by selecting a pre-configured Sales Taxes and Charges Template
- Ensure the total tax amount is calculated correctly before proceeding
5. Saving and Submitting Fiscalizing the Invoice
Once all details are correct, the final steps will save the document and complete the fiscalization process:
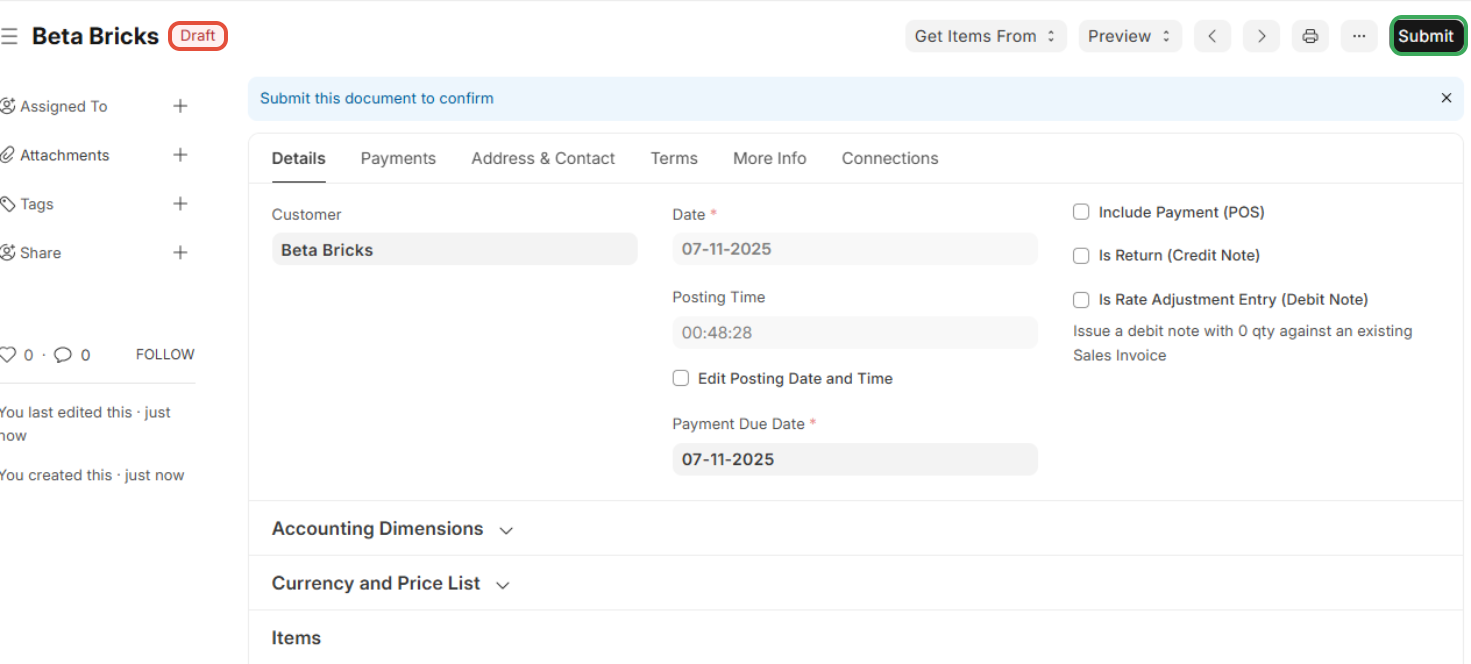
- Click the Save button in the top-right corner
- The invoice status will change to Draft
- Click the Submit button in the top-right corner. Submitting the invoice triggers the fiscalization process.
- You will receive a confirmation message that the Sales Invoice has been submitted successfully

Your invoice is now fiscalized and recorded!
Was this article helpful?
That’s Great!
Thank you for your feedback
Sorry! We couldn't be helpful
Thank you for your feedback
Feedback sent
We appreciate your effort and will try to fix the article