Overview: This guide provides a step-by-step process for integrating ERP Next with the Fiscal Harmony plugin, facilitating the fiscalization of invoices and credit notes for compliance with the Zimbabwe Revenue Authority (ZIMRA).
Setting up ERP Next with Fiscal Harmony requires you to be in the Frappe Bench environment to complete the setup.
Step 1: Add the App to Bench
First, install the application using the command below:
bench --site your_site_name install-app erpnext_fiscalisation
After running the command, you should see a message indicating that the application has been successfully installed.

Step 2: Migration
You need to migrate the database to ensure everything is set up correctly. Run the following command:
bench migrate

Step 3: Check if the App is Installed Successfully
To verify whether the app is installed, run this command:
bench list-apps
You should see the app listed among the installed applications.

Step 4: Restart the Bench
Once you’ve confirmed that everything is installed correctly, restart the bench using the following command:
bench restart
This will restart the entire bench terminal.

Step 5: Update ERP Next App
Go to your ERP Next app and refresh the page. You should see Fiscal Harmony among your applications.
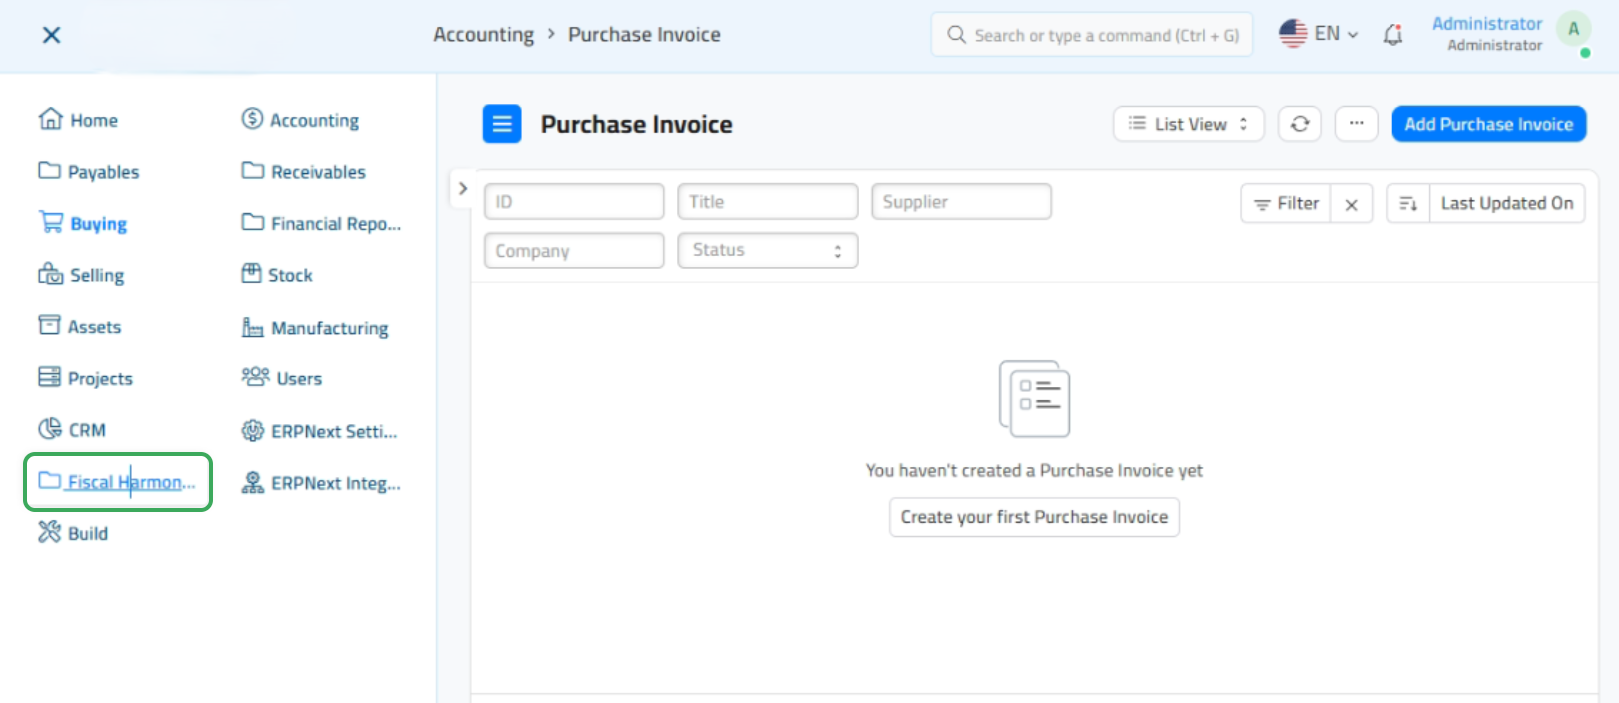
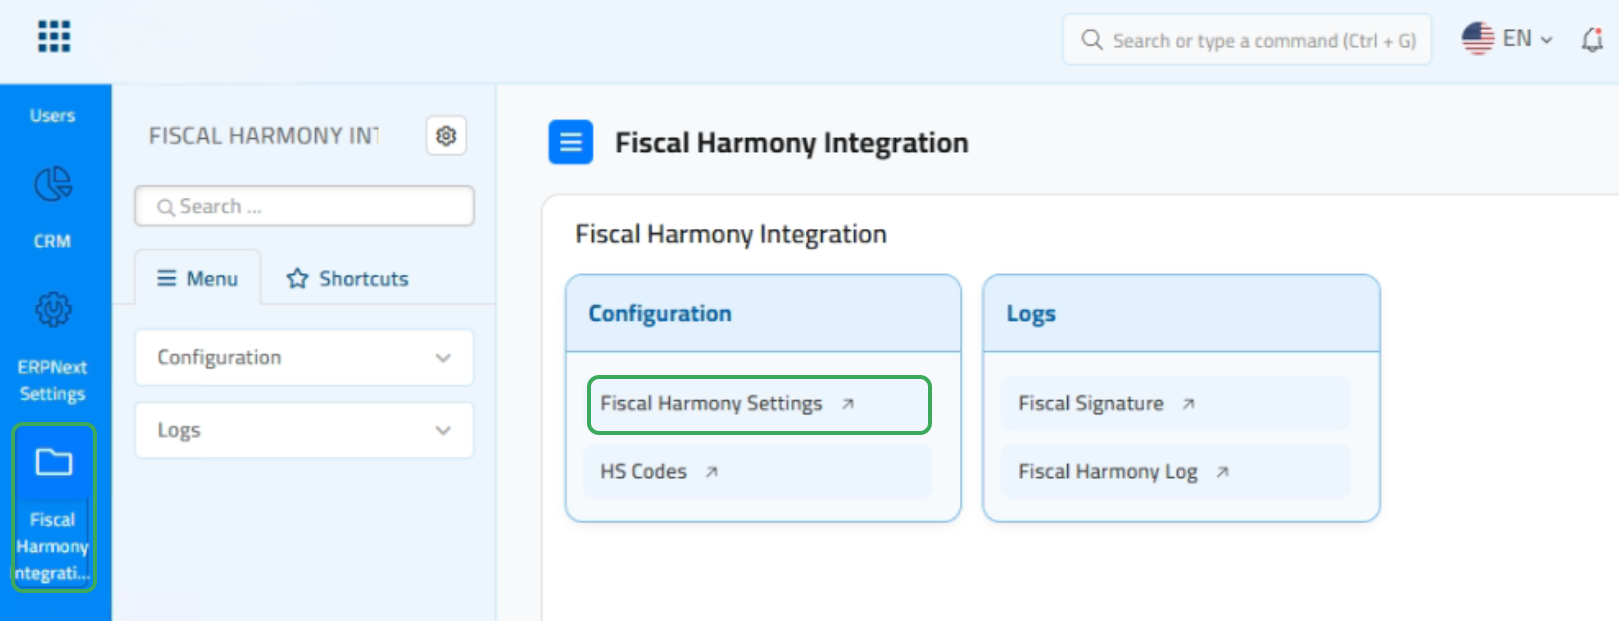
Step 6: Access Fiscal Harmony Settings
Click on Fiscal Harmony Integration and then select Fiscal Harmony Settings to proceed with the setup.
Step 7: Configure Fiscal Harmony Settings
On the Fiscal Harmony settings page, you need to focus on three sections to ensure successful fiscalization:

1. Fiscal Harmony Connection Test
First, click on Update API Token to add your API Keys and Secret Keys, then click submit to save them. Enter the following endpoint:

https://api.fiscalharmony.co.zw/api
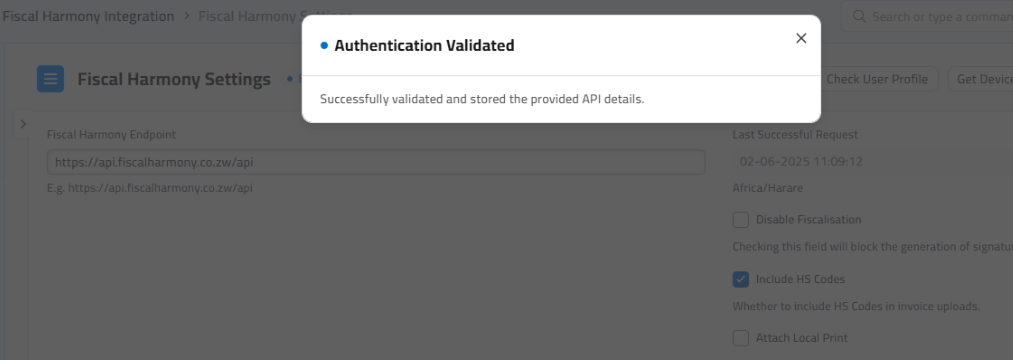
Next, click on Check User Profile. You should see a status similar to the one in the provided image, along with your User Profile ID.

2. Currency Mappings
The next step is to map your system's currency with Fiscal Harmony. After adding the necessary currency mappings, click Validate Currency Mappings.

3. Tax Mappings
Add the tax mappings according to how you have configured your taxes in your ERP system and Validate your Taxes. These should correspond to:
- Standard Rate: 15%
- Zero Rated: 0%
- Exempt
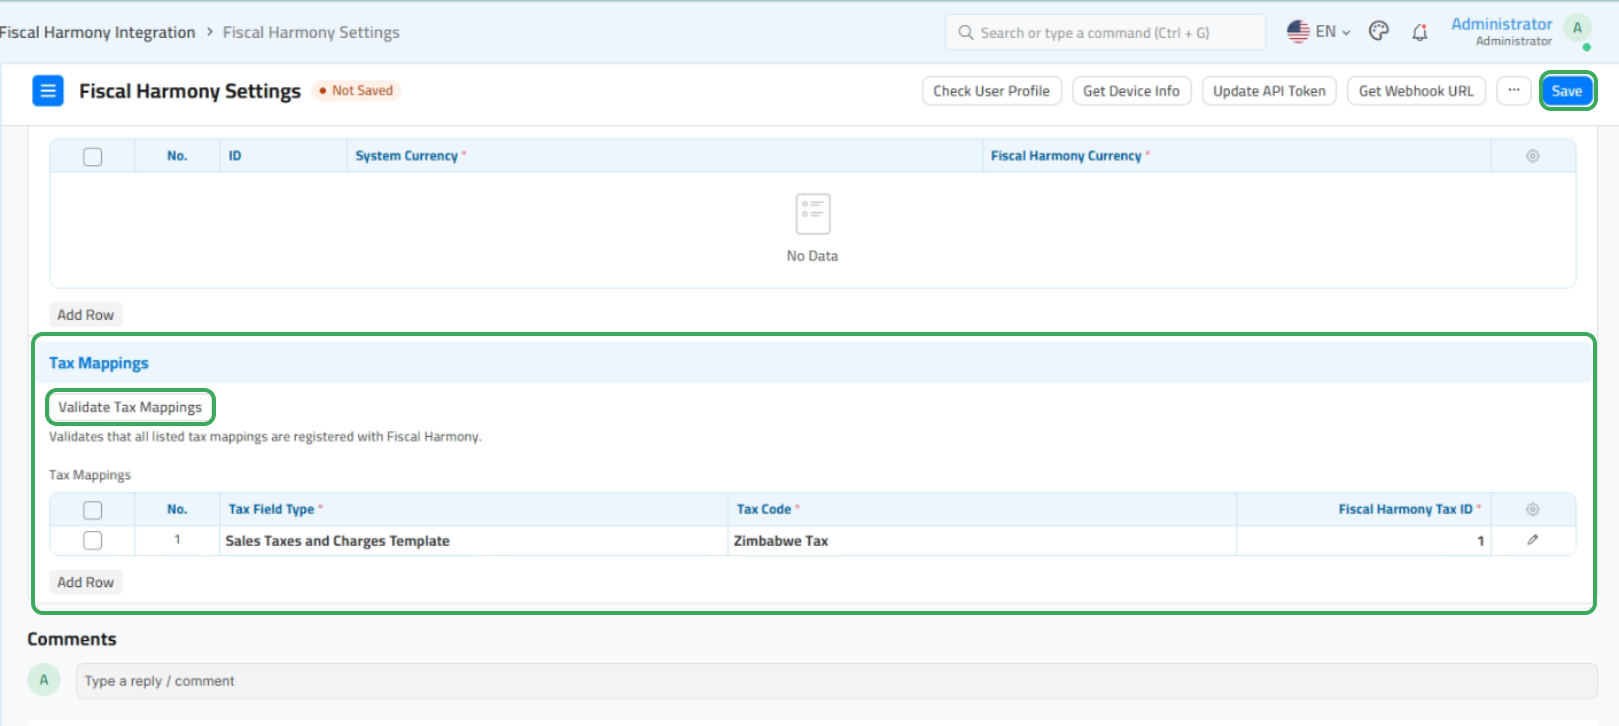
Step 8: Save Your Changes
After completing all the above steps, don’t forget to save everything you have done to be ready for fiscalization.
Was this article helpful?
That’s Great!
Thank you for your feedback
Sorry! We couldn't be helpful
Thank you for your feedback
Feedback sent
We appreciate your effort and will try to fix the article